Open Sniffer Installation
Feature-rich Analyzer For Zigbee / 6lowpan / 802.15.4 Networks And Iot Devices
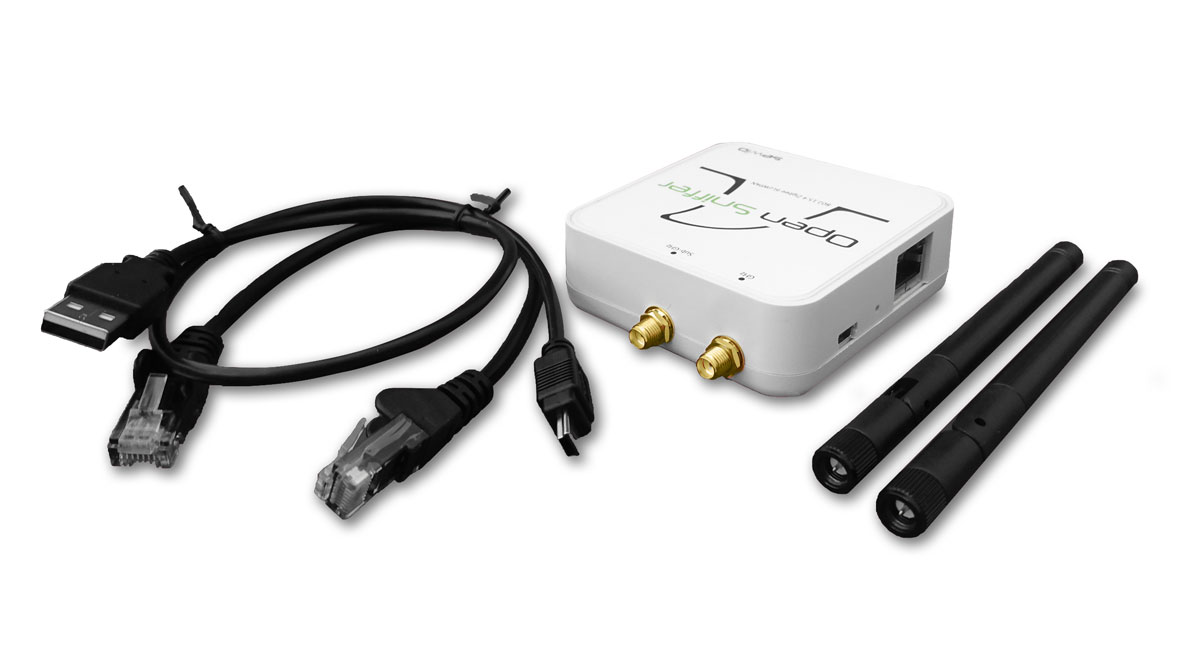
1) Hook up components to the Open Sniffer probe
Note: Newly, the open sniffer device is delivered with two identical antennas with good multiband performance. Here you can find datasheet.
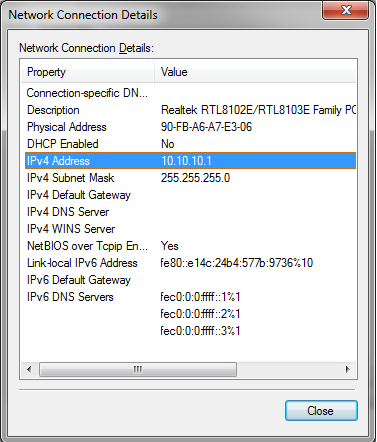
2) Setting TCP/IP at the host side
| Parameter | Value |
| DHCP | OFF |
| Filter 802.15.4 frames with bad CRC | OFF |
| IP address | 10.10.10.2 |
| Network mask | 255.255.255.0 |
| Gateway address | 10.10.10.1 |
| Remote Host IP address | 10.10.10.1 |
| Remote Host port | 17754 |
| Radio Channel | 15 |
| Modulation | O-QPSK (250kbit/s) |
| Receiver sensitivity | HIGH |
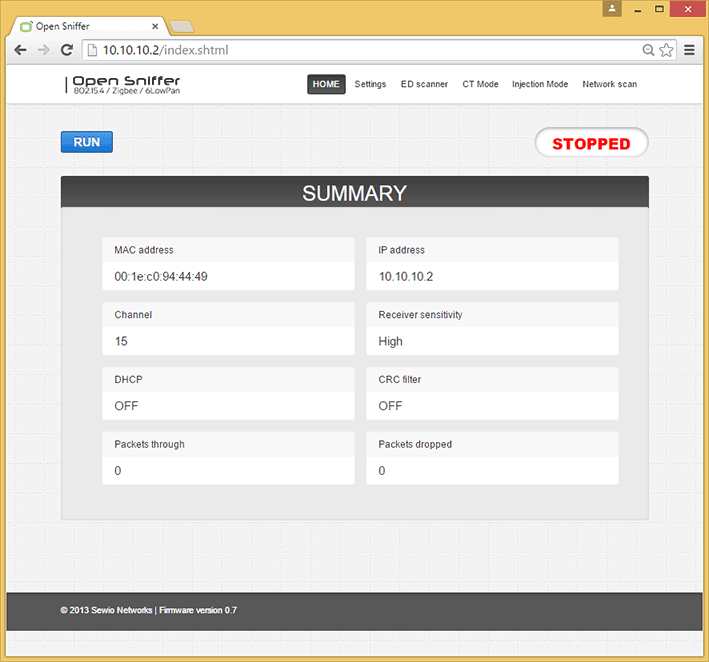
3) Connect to the Open Sniffer probe homepage
1) Wireshark installation
2) Start Wireshark capture

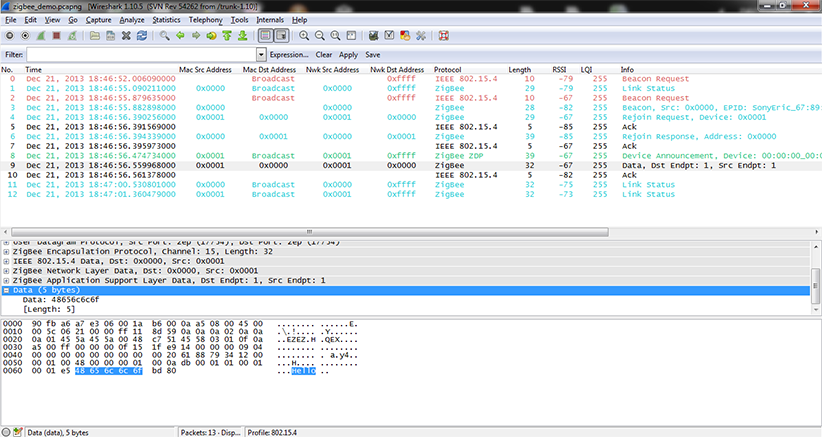
Wireshark implicitly shows all frames from wired and wireless networks delivered to the selected interface. Therefore, it is useful to apply 802.15.4 filter which is referred as “wpan”.

3) Start Open Sniffer

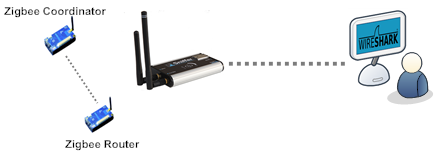
4) Let’s sniff some communication
Let’s explain Wireshark settings in more detail.
1) Wireshark columns
Wireshark has default columns settings for wired Ethernet network, see picture below.
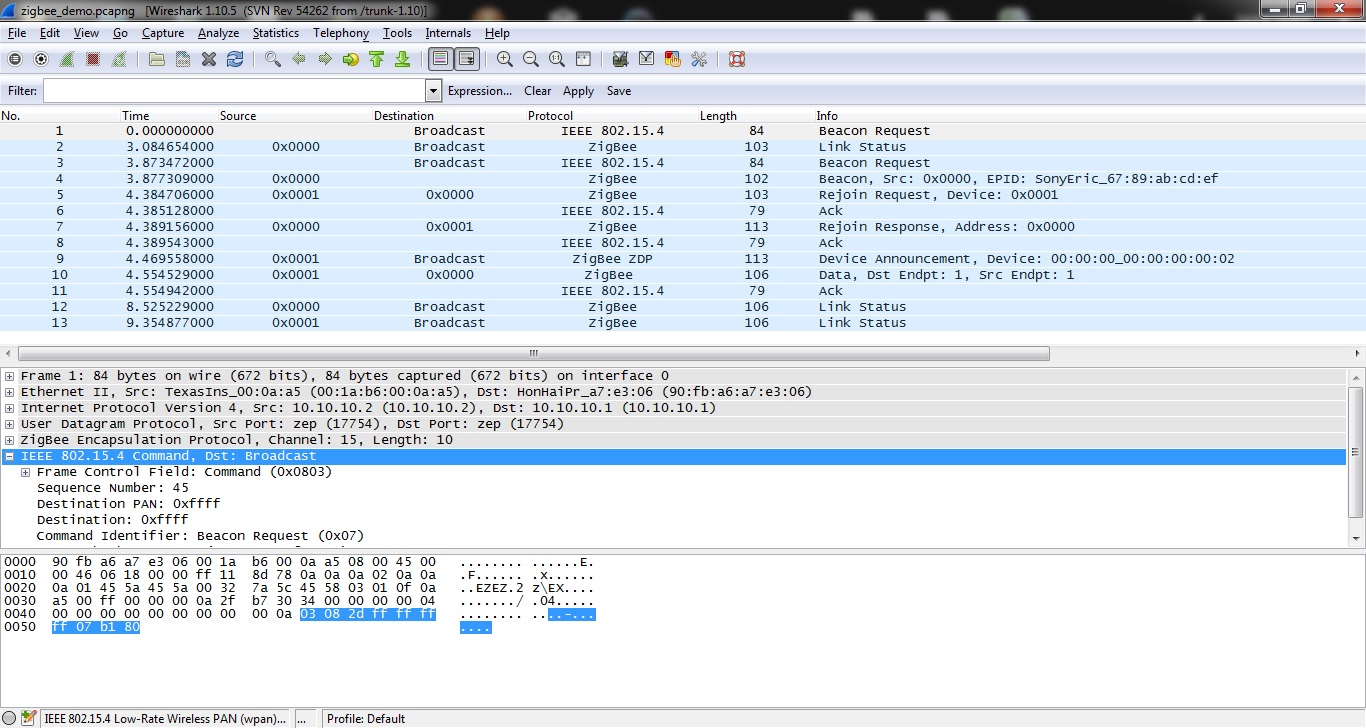
Columns are defined for the default Wireshark profile as follows:
| Column name | Description |
| No. | Frame number counted from the start of capture in Wireshark. This is NOT number of packet received from Open Sniffer probe. It includes all packets delivered to the host’s ethernet interface |
| Time | Ethernet timestamp of the frame assigned by the operating system. This is NOT precise timestamp from Open Sniffer probe. |
| Source | Source Address |
| Destination | Destination Address |
| Protocol | Protocol |
| Length | Length of entire Ethernet frame including transportation overhead. This is NOT length of 802.15.4 frame |
| Info | Protocol details |
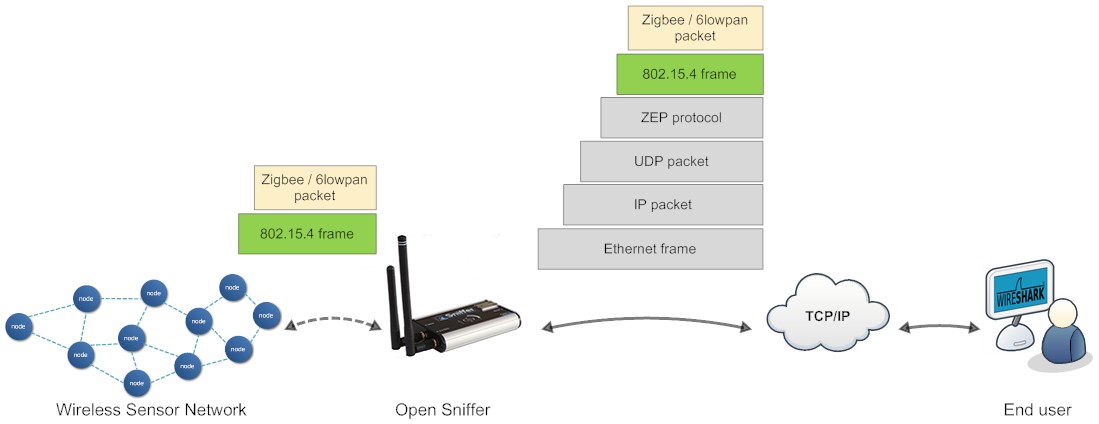
From the table above it is obvious the default column settings are not associated with 802.15.4. Therefore you can adjusted them to the 802.15.4 frame info. Let’s refresh the encapsulation scheme for each 802.15.4 frame delivered to the host (see picture below). While the grey colored protocols are used only to transport the 802.15.4 frame through a network infrastructure, the ZEP – Zigbee Encapsulated Protocol carries all the important information such as sequence number, timestamp or channel number related to the every 802.15.4 captured by the Open Sniffer probe.
2) Install ZEPv3 plugin
Although, Wireshark natively contains ZEP protocol v2, we provide ZEPv3 which is backwards compatible and brings additional information related to 802.15.4 band, channel page and precise timestamp information.
- Download ZEPv3 plugin from download page.
- Extract and copy plugin to the Wireshark plugin folder.
Windowsc:\Program Files\Wireshark\plugins\1.x.x\,
Linux/usr/local/lib/wireshark/plugins/1.x.x/. - Start Wireshark. menu Analyze -> Enabled Protocols (CTRL+SHIFT+E)
- Uncheck ZEP, check ZEPv3
- Apply, OK.
- h) If the new dissector is not applied go to menu Analyze -> Decode as -> ZEPv3 -> Apply, OK.
ZEPv3 contains fields illustrated in picture below:

3) Adjusting Wireshark columns to 802.15.4 frame
Adjusting columns procedure:
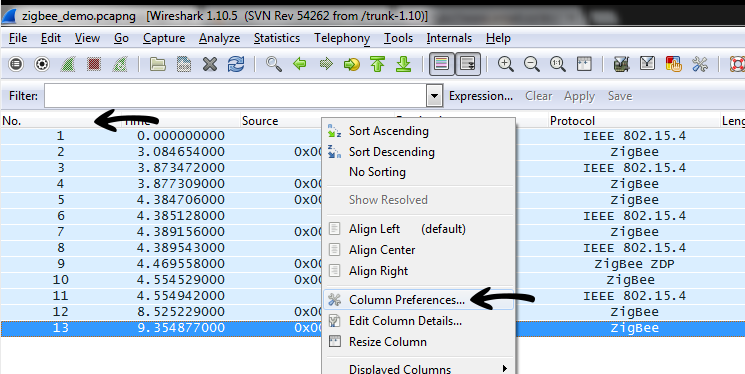
- Right click on the columns header
- Select Column Preferences
- Adjust columns to 802.15.4
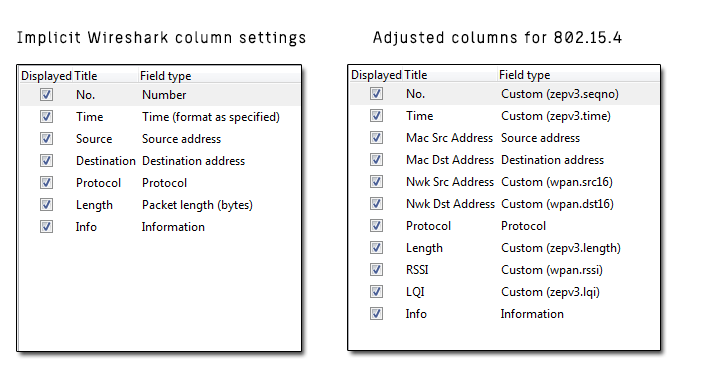
Adjusted Wireshark columns should seems like this:

Using our 802.15.4 profile with predefined color rules: